Advanced LightBurn Bridge Setup
If you either want to roll your own LightBurn Bridge with a Raspberry Pi you already own or just want to dive deeper into configuration options, this page is for you.
First, please note that LightBurn bridge is only supported on Raspberry Pi 3b, 3b+, or 4 models. Any others will not work. Also we can only provide limited support self-built LightBurn Bridge devices.
We do not provide the option to install LightBurn Bridge on an existing Raspberry Pi OS installation, as it's designed as a single purpose "appliance" device. Any modification to the installation, aside from those mentioned below, will void any warranty or support obligations from LightBurn Software.
Flashing the LightBurn Bridge image to an SD card
If you purchased a pre-flashed SD card or complete kit, you can skip this section, unless you're upgrading the kit you have to a newer version. If you're upgrading, power off the Pi, and remove the SD card from the bottom, shown here:
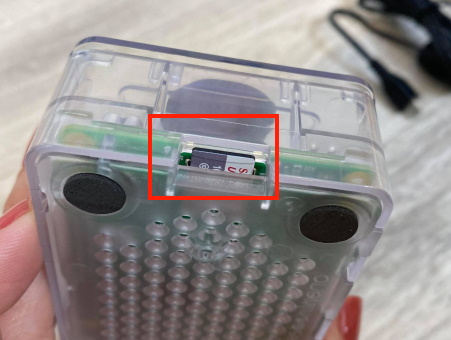
To remove the card, use a fingernail, the tip of a pen, or a pair of tweezers to hook the small lip and the end of the card and pull it out.
Download the LightBurn Bridge disk image file from here and save it to your computer.
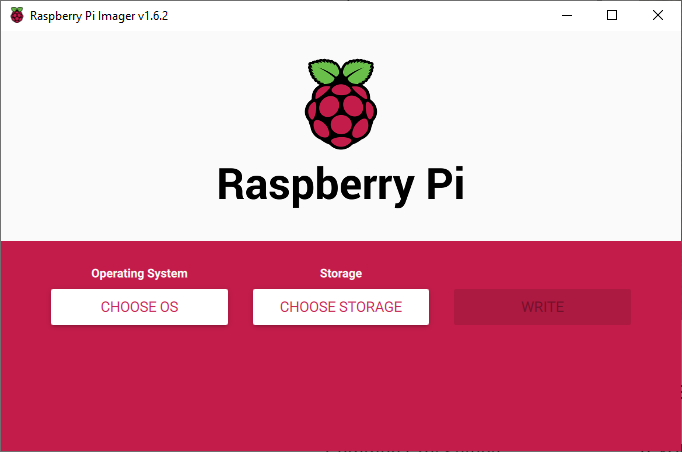
After you've downloaded the LightBurn Bridge image file, you will need to flash it to a 4GB or larger micro SD card. For that task, we recommend you download Raspberry Pi Imager. It's cross platform and will handle the task with ease. Install the tool and open it:
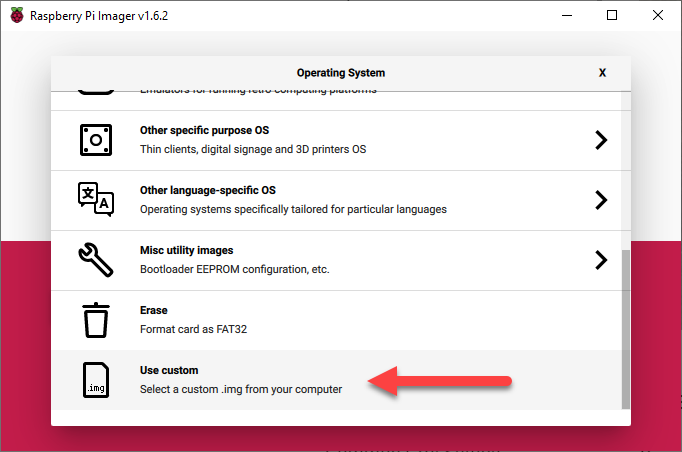
Click on CHOOSE OS (the left-most button in the middle), then scroll to the bottom and click on Use custom:
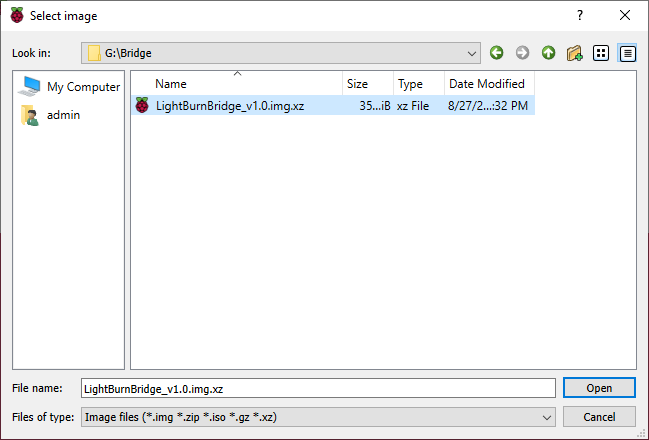
Browse to the folder you downloaded the .img.xz file to (most likely your Downloads folder), select the file, then click Open.
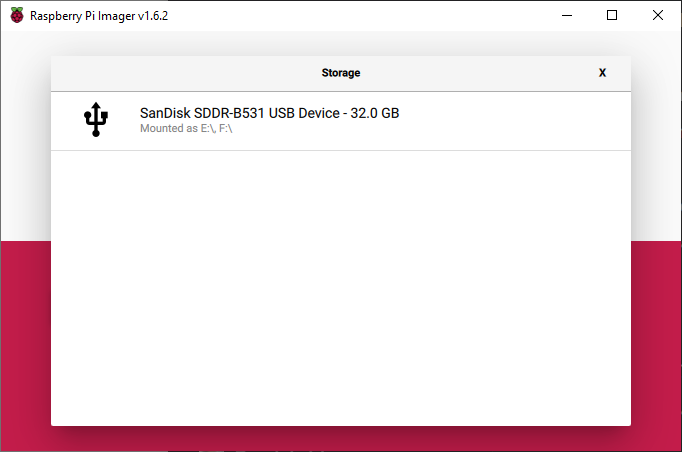
Insert your SD card into your computer and, back on the main Raspberry Pi Imager window, click on CHOOSE STORAGE. Select the correct device - in most cases it will be the only option. If you don't see it, try removing the card and re-inserting it, or unplugging your card reader and connecting it again. You can leave the 'Storage' window open when you do this - when the SD card appears, select it.
Finally click the WRITE button. It will warn you that you're about to overwrite the SD contents - click ok, and wait for it to write the image. At the end of the process, it will verify it was written correctly.
That's it! You now have your own LightBurn Bridge SD card to use in your own Raspberry Pi. If you want to do any sort of advanced configuration ahead of time, head on to the section below. Otherwise just insert the card into the Raspberry Pi, then connect it to your laser as detailed in the main documentation, turn it on, and continue with the LightBurn Bridge setup
Advanced Configuration
Manual WiFi Setup
By default, the LightBurn Bridge automatically presents a WiFi access point which you can connect to and configure your WiFi connection through. However, if that option is not working for you - for example, if you have a network with a hidden SSID - or if you would simply like to pre-configure your device, you can use the wifi.txt option.
Insert the micro SD card into your computer (either one you made or a pre-flashed card you purchase) and find the newly mounted drive labeled boot as shown below.
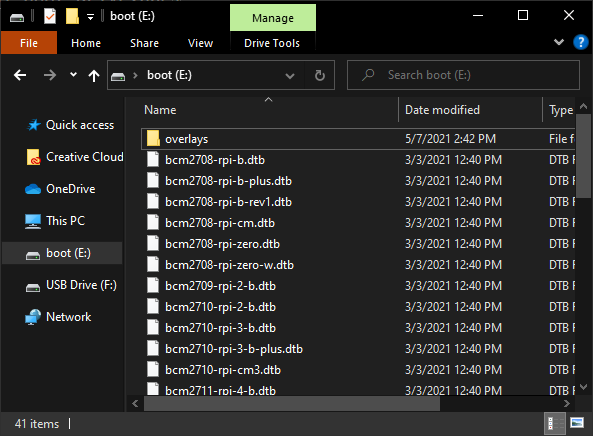
This will, of course, be a little different on each operating system. Some systems may show two drives/partitions and the other will likely be unreadable. That's ok, just find the one labeled boot and open it.
Now create a file called wifi.txt and open it in the text editor of your choice. Note, this must be a simple text editor like notepad, TextEdit, or gedit and not a rich document editor like Word.
Now add two lines as follows:
ssid=YourNetworkSSID
pass=YourNetworkPassword
Of course, replace the values after the = with whatever matches your network.
Note
Both of these fields are case-sensitive. Double check your network name and password for proper capitalization!
If your network is not password protected, you may simply leave out that line of the file.
Do not include anything else in this file!
Now eject the drive, remove the SD card, re-insert it into your Raspberry Pi, and power it back on.
It will read this file on boot and attempt to connect to the network.
If it succeeds, it will be renamed to wifi.txt.loaded. If it fails, it will be renamed to wifi.txt.failed and the WiFi configuration access point will make itself available as normal. The access point will generally be the first indication that the connection failed, but you can confirm by checking that file name after re-inserting the card into your computer.
If it fails, recheck the SSID and password in the file, rename it back to wifi.txt and try again.
LightBurn Bridge Configuration Options
You can also configure a few items manually via another file on the boot partition (as described above) called bridge.json. This file will not be created on the boot partition until the device has been booted up at least once, but you can create it yourself ahead of time, if desired, using the template below.
{
    "laser_ip": "10.0.3.3",
    "device_type": "ruida",
    "ap_name": "LightBurn Bridge E4B7"
}
These options are as follows:
laser_ip: The static IP address configured on your Ruida laser controller. By default you will need to set it to10.0.3.3which we've chosen because it's unlikely to use this IP subnet for a private WiFi network. For complicated reasons, the IP address of the Ruida must be on a different subnet (the10.0.3part of the address) than your WiFi network. In general, you should never change this value unless this conflict exists.device_type: At the time of writing thisruidais your only option. There will likely be options added in the future though, so don't change this!ap_name: By default the WiFi configuration Access Point name will beLightBurn Bridgefollowed by four random letters or numbers, for example:LightBurn Bridge E4B7. This is so that you can have multiple devices in the same area and their access points won't conflict. But you can also set it to be whatever you want here. You may use any alpha-numeric characters and symbols, with the exception of?"$[\]+, and it must be between 6 and 32 characters.
After making changes, simply save it back to the boot drive/partition that is mounted from the SD card on your computer. Then insert the card back into your Pi and turn it on.