Flashing Guide
If your Sculpfun S9 (or similar laser) doesn't have the ability to permanently save changes made to the firmware, you may need to re-flash the microcontroller inside of it. This lets the brain running the diode use newer features of GRBL (the software controlling your laser inside it's electronics) effectively, and helps you avoid the possibility of forgetting to click the homing button.
Prerequisites
While this guide requires no additional physical components, several downloads are needed.
Info
This guide was written for older versions of the Arduino IDE released before 2.0. Major changes were made when that version was released, and as such, this guide may not work with them. Please revert to use these steps, or find a newer guide to update your laser. Thank you!
Warning
To successfully flash your laser, high attention to detail is needed. Flashing your firmware incorrectly can damage your machine. Read the whole guide, start to finish, before trying to flash your machine.
Prep
Plug in your laser's power and USB, connect it to your computer, and open LightBurn.
In LightBurn, use the macro created in the Limit Switch Guide to apply the needed limit switch firmware changes, and afterwards use the Edit -> Machine Settings dialog. In this window, you'll want to click "Save to file". This allows you to save a backup of the laser's configuration that's know to work before we flash firmware and reset all of those settings.

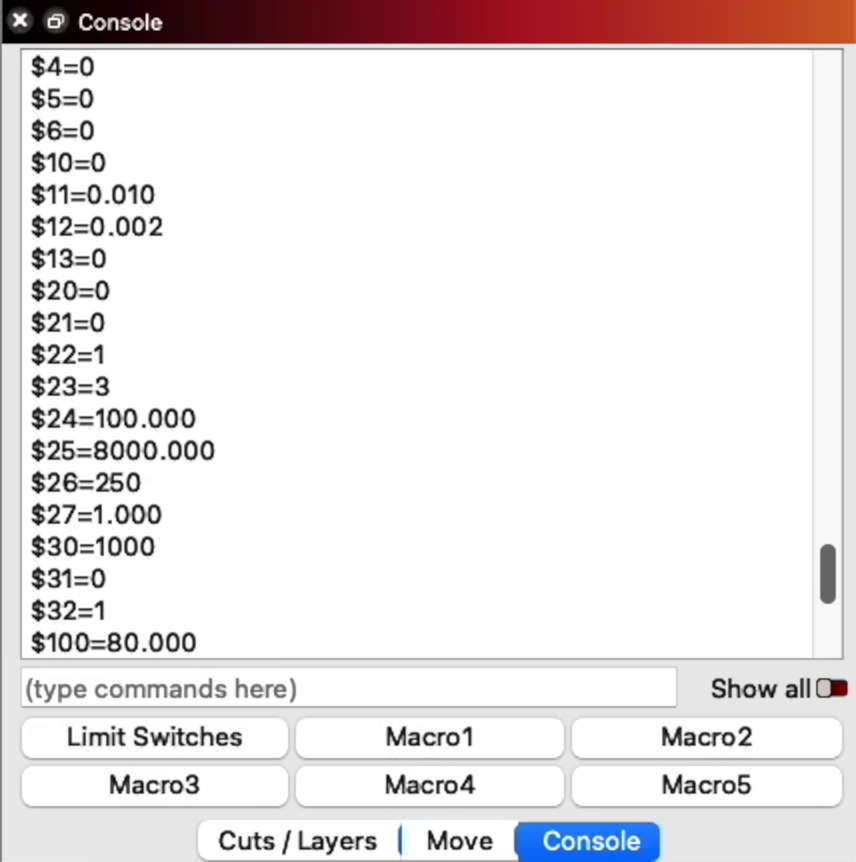
Backup via Console
Using the Console, you can enter "$$" to get the GRBL values of the machine to supplement those from the Machine Settings window. This gives you a further verification step to make sure the laser's behavior is as intended after flashing. Copy those to a text editor like Notepad or TextEdit and save for safekeeping.
Attention
At this point, please close LightBurn. Not doing so will cause flashing errors later in this process.
Arduino IDE
To flash a newer version of GRBL to your laser, you'll need to download Arduino IDE. As a toolkit to enable microcontroller development in a friendly bundle, it allows you to make any changes we might need to make, connect to the laser, and send the new version of GRBL to your device.
You'l need to install Arduino IDE through the appropriate installer for your system, but the specifics will vary computer to computer.
GRBL
To actually have something to flash to the laser, you'll need GRBL. An off-the-shelf version of GRBL however, assumes we have three axes, not two. As a result, when it goes to home the "Z" axis, it never proceeds to the next step as it physically cannot trigger a limit switch that doesn't exist.
To make this step easier, we already made the necessary modifications to the last current (1.1h) GRBL version for you, disabling the third axis. Download the file linked and extract it.
Setting Up Arduino IDE
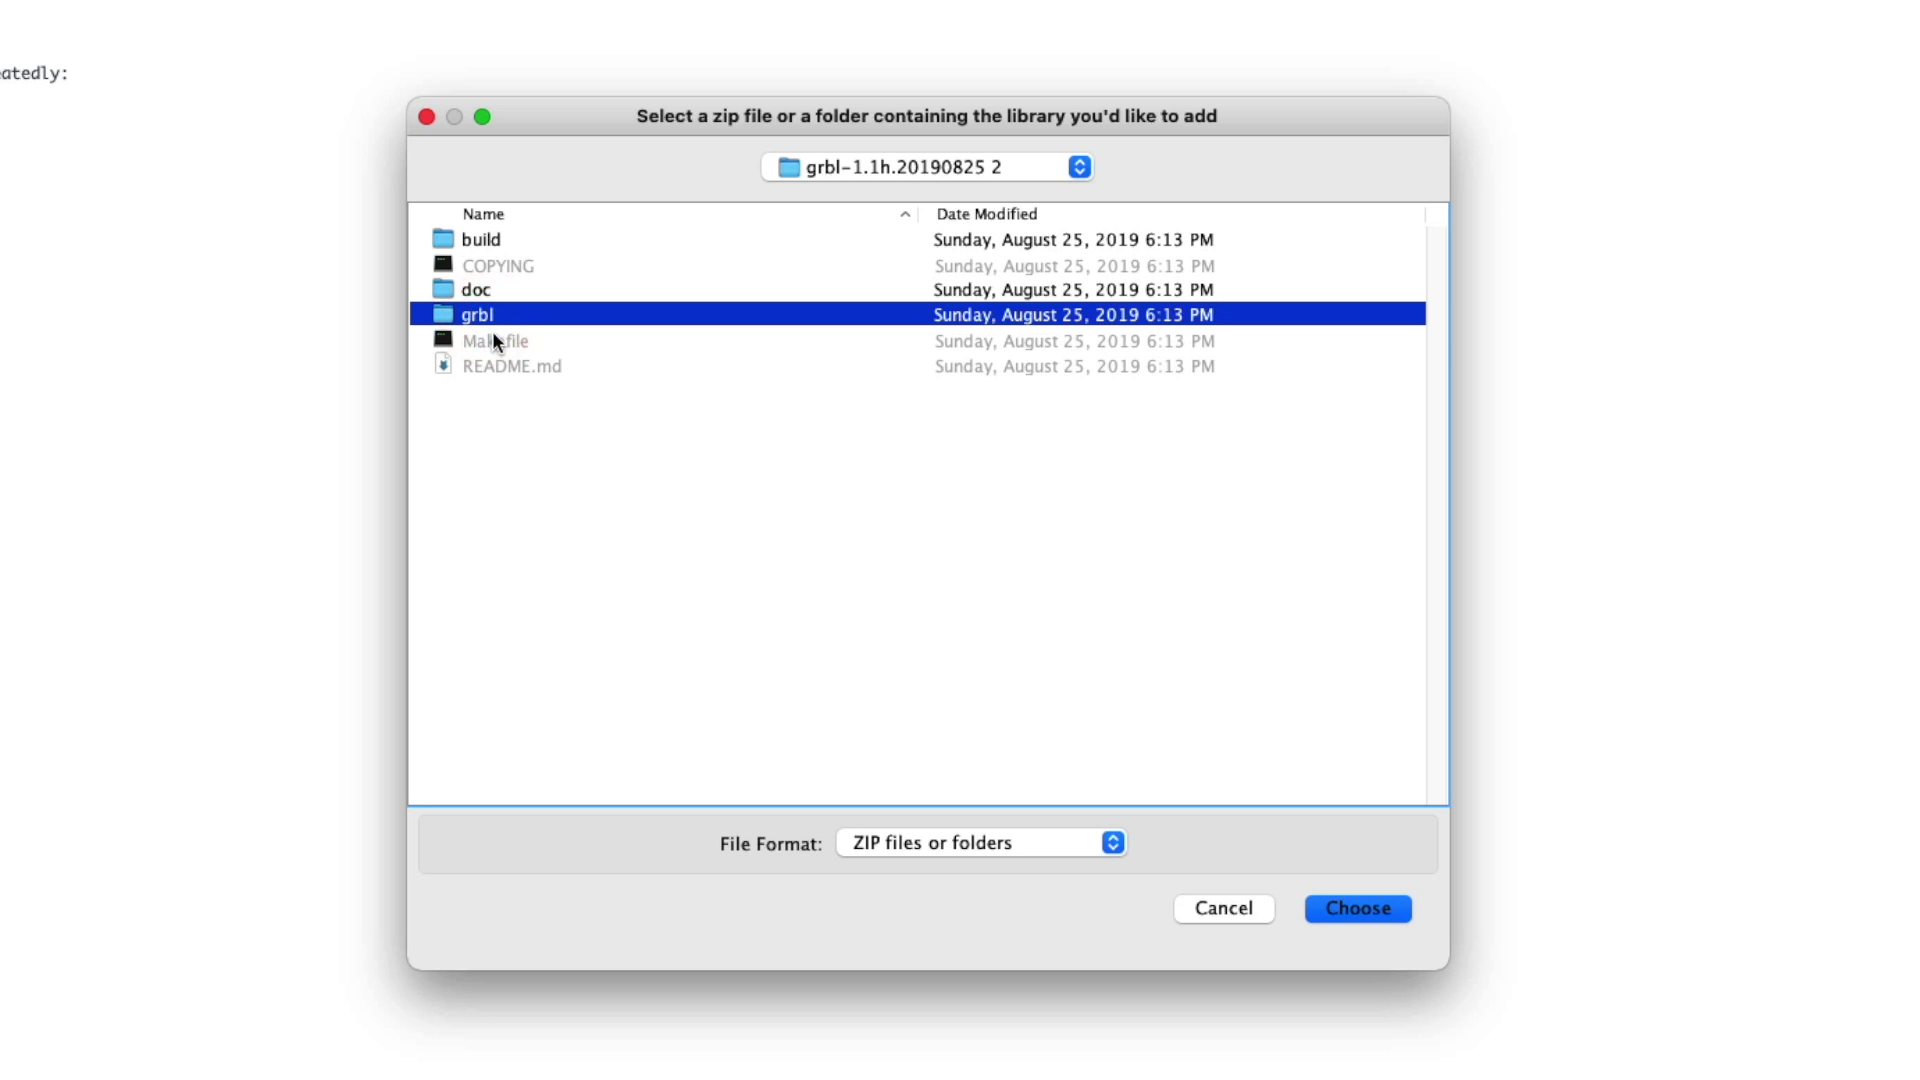
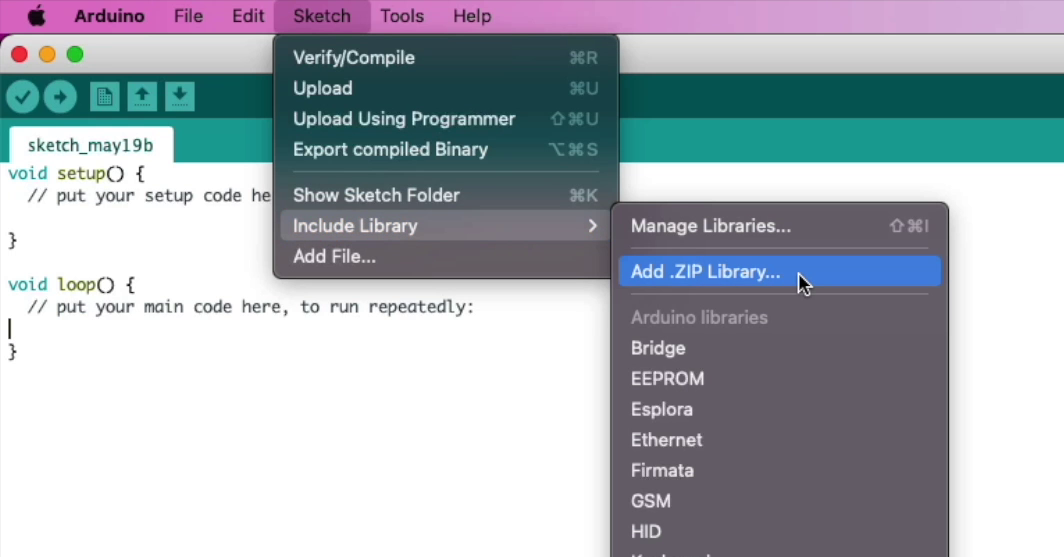
In Arduino IDE, we'll need to open the Sketch Menu, click "Include Library", and then "Add .ZIP Library". This allows us to tell The Arduino IDE that the code you've downloaded is something you need it to use.
Warning
Make sure that "Makefile", "COPYING" and "README.md" are visible in the folder you select; the folder inside of that one labeled grbl is not the correct folder for Arduino IDE to recognize it.
In other words, select the grbl folder in the root of the ZIP you extracted.
You'll then need to go back to the menu by going to Sketch, Include Library and ensure that "grbl" is listed under "Contributed Libraries".
To get ready to flash your board, open the "File" menu, Examples, "grbl" and "grblUpload". It will open a new window containing the sketch mostly ready to go. You'll need to select your board and port still, and tell Arduino how and where to upload the new firmware.
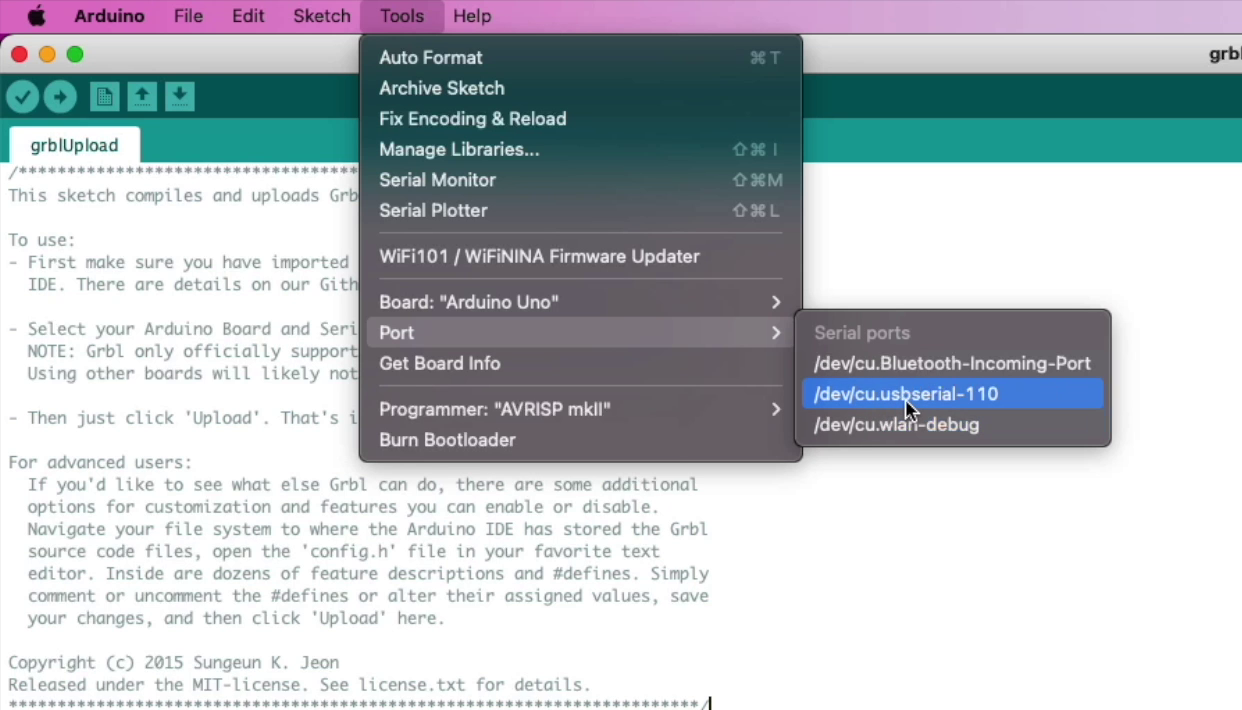
Port & Board Configuration
We're working with a board resembling the MKS DLC 2.0, running an Atmel 328p. To the Arduino IDE, this is an Arduino Uno, as that's the chip the Uno is based on. Under Tools, Board, select "Arduino Uno" near the top of the list.
You'll also need to select the correct port to send the firmware on, so open Tools, Port, and take note of the ports listed.
Connect your laser via USB and check the Ports menu again to look for any new devices. Unplug and replug your laser once more to confirm the port the laser is on, and select it.
Flashing
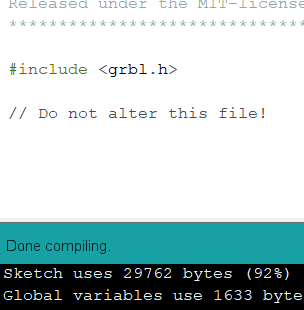
Use the checkmark  at the top left to verify that you've set the project up correctly, and note on the bottom of the screen above the black terminal area says "Done compiling." when you do so. If it does, we're ready to upload!
Click the arrow button  to the right of the checkmark, and it'll begin to flash to your laser! When "Done uploading." is shown, you can continue!
Note
If there's an error shown that it can't access the port in some way, make sure that you closed LightBurn. Only one device can "have control" of certain peripherals, and Arduino IDE needs full control of that device for a moment to send the new firmware.
Restoring Settings
In LightBurn, open the Machine Settings menu again, and click "Load from file", selecting the "lbset" or "LightBurn Settings" file we'd made at the start of the guide. At this point, click "Write" to apply these settings to our machine's firmware. This transfers the configuration back to the machine, and writes them to EEPROM, or programmable memory. This means our homing behavior will be consistent through machine reboots.
When this has finished, the window will show "controller settings written successfully".
Verifying
In the console, enter
$$
Once more and verify that the settings match that of the macro made originally, and/or the backup file we made when backing up via Console.
Finished!
If these settings hold, you'll be able to click the "Home" button in LightBurn and have it home automatically, without any additional use of macros.