Basic Usage: The Essentials
So far we've done a brief introduction to the UI and covered zooming, panning, and selecting.
The next things we'll cover are:
- Creating Shapes
- Importing Artwork
- Moving and Sizing Artwork
- Grouping
- Cut Layer Settings
- Controlling the Laser
Creating Shapes
LightBurn's shape creation tools let you create simple shapes. Choose a tool from the left toolbar, like the ellipse, rectangle, or polygon tools. With a tool selected, left-click in the workspace and drag the mouse to adjust the size of the shape you're creating. While dragging, the Shift key will force the shape to have the same width and height, so you get circles and squares instead of ellipses and rectangles. The Ctrl key causes the shape to be centered on the starting point, instead of dragging it out from corner to corner. Release the mouse button to finalize the shape.
For text, select the text tool, then click in the edit window to place the cursor. Type your text, and press the Esc key when finished.
Importing Artwork
The shape creation tools let you make simple shapes in LightBurn, like circles, rectangles, text, and polygons, and also give you the ability to edit and adjust them, but LightBurn isn't intended to be a complete artist package or dimensioned modeling tool. For that, you would use external software like CorelDraw, Adobe Illustrator, Inkscape, or AutoCAD. Photo or image manipulation software such as Photoshop or GIMP can be used to create or manipulate image files.
When you have artwork ready in one of these programs, the next step is to import it into LightBurn to adjust the settings. LightBurn can import the following file types:
Vector / mixed formats:
- .ai - Adobe Illustrator
- .svg - Scalable Vector Graphics
- .dxf - AutoCAD Drawing Exchange Format
- .pdf - Adobe Portable Document Format
- .plt / .hpgl - Plotter / Hewlett-Packard Graphics Language
Image formats:
- .png - Portable Network Graphics
- .jpg / .jpeg - Joint Photographic Experts Group format
- .bmp - Windows Bitmap
- .gif - Graphics Interchange Format
- .tif / .tiff - Tagged Image File Format
Note that not all features of every format will be supported. Vector graphics formats in particular are incredibly complex, and using more advanced features, like pattern fills, masking, gradients, and so on will not necessarily translate well when importing. LightBurn cares about shape outlines - if you want artwork to include the advanced features, the best option is usually exporting as a high-DPI image.
You can import files into LightBurn in several different ways:
- Clicking the Import button on the main toolbar (
 )
) - Using the File > Import option from the main menu
- Pressing the Import keyboard shortcut (Ctrl + I)
- Dragging a file from the Windows Explorer or MacOS Finder into LightBurn
- Copying and Pasting an image from a browser window into LightBurn
Moving and Sizing Artwork
Once you have your artwork in LightBurn, the next step is usually placing or sizing it. When one or more items are selected, you'll see various "tool handles" appear around the outside of the selection, like this:
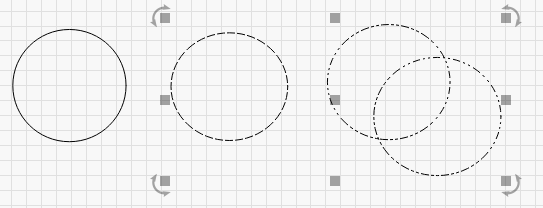
In the image above, you can see 9 gray squares, and four arrows. If you hover your mouse over any of them, the cursor will change to indicate the kind of operation that tool performs - resizing, moving, or rotating.
Grabbing any of the four corners will let you resize the artwork from that corner, and defaults to uniform resizing with the opposite corner as the anchor point. Holding the Ctrl key (or Command on Mac) switches the anchor point to the center, so the object center remains in place when resizing. Holding the Shift key allows you to resize the width and height independently, instead of locking them together.
Grabbing any of the four side handles will let you adjust the width or height of the selection, and the Ctrl (or Command) key switches to center anchor just as it does with corner sizing. When moving, the status bar shows both the absolute position of the selection being moved, and the relative distance it has moved.
The center handle is for moving the selection, though you can also click and drag any edge of any shape to do this as well. When moving a selection, holding the Shift key constrains the movement to be horizontal, vertical, or diagonal.
The four rotate handles allow you to rotate the object freely using the mouse. While rotating, the relative rotation is displayed in the status bar. Holding the Ctrl key (Command on Mac) snaps the rotation to the nearest 5 degrees, holding Shift will snap to 15 degrees, and holding Ctrl+Shift snaps to 45 degrees.
You can also move, rotate, and resize artwork using the Numeric Edits Toolbar.
Grouping
When you create shapes in LightBurn, they're independent of other shapes you create. Sometimes it's handy to be able to treat a collection of things as a single unit, to make sure they keep their relative position and size when you're moving them around. In LightBurn, this is called a Group. If you select two or more shapes and click the 'Group' button ( ), or press Ctrl+G, you'll create a new object that contains the original shapes. To un-group the objects so you can edit the individual parts, select a group of shapes and click the un-group button (
 ), or Ctrl+U.
You can tell if a shape is in a group or not based on how it looks when selected.
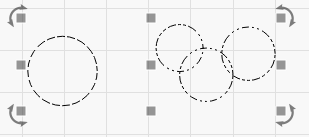
Ungrouped objects are displayed with a simple dash pattern when selected, like the single circle above on the left. A grouped shape shows a repeating dot-dot-dash pattern when selected, shown on the three smaller circles above on the right.
Cut Layer Settings
Artwork imported from vector files assigns shapes to layers in LightBurn based on the colors of the vectors in the original file. If you create your files with this in mind, it can save you time.
Layers in LightBurn are used to assign different settings to the shapes in your design. For example:
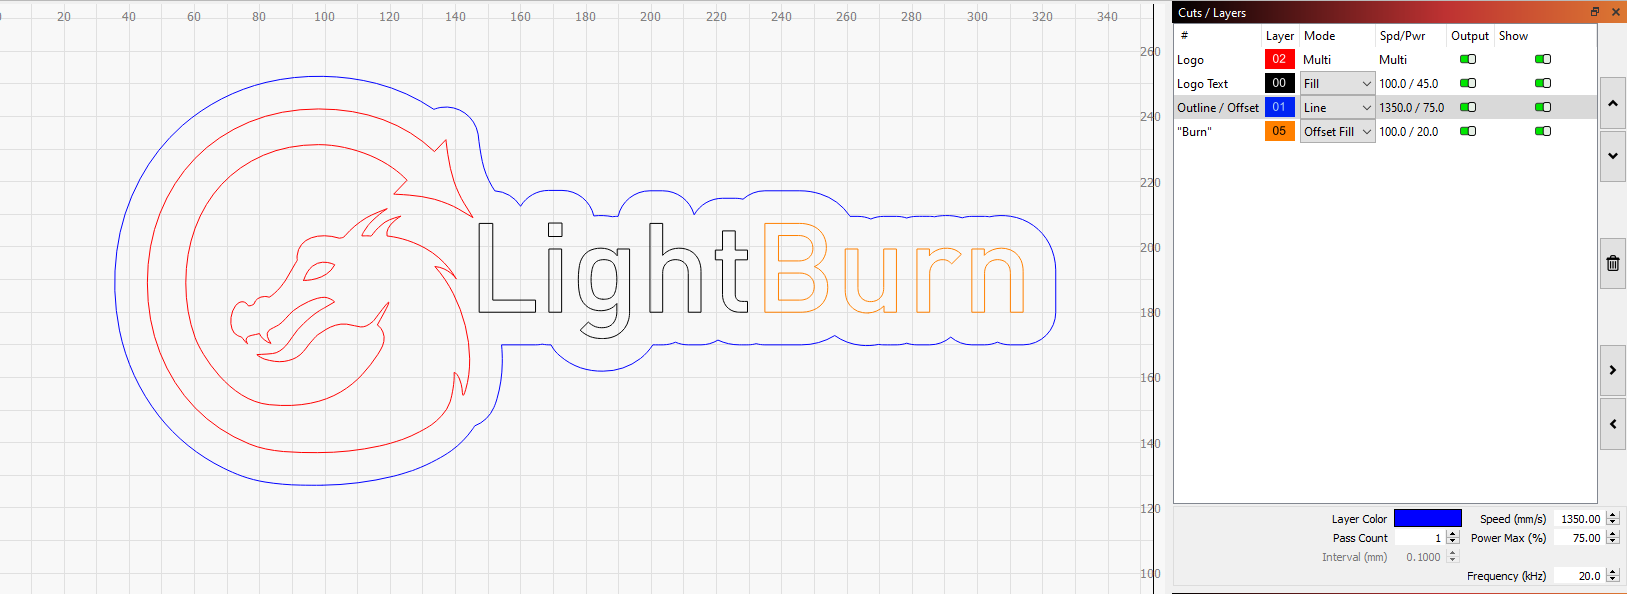
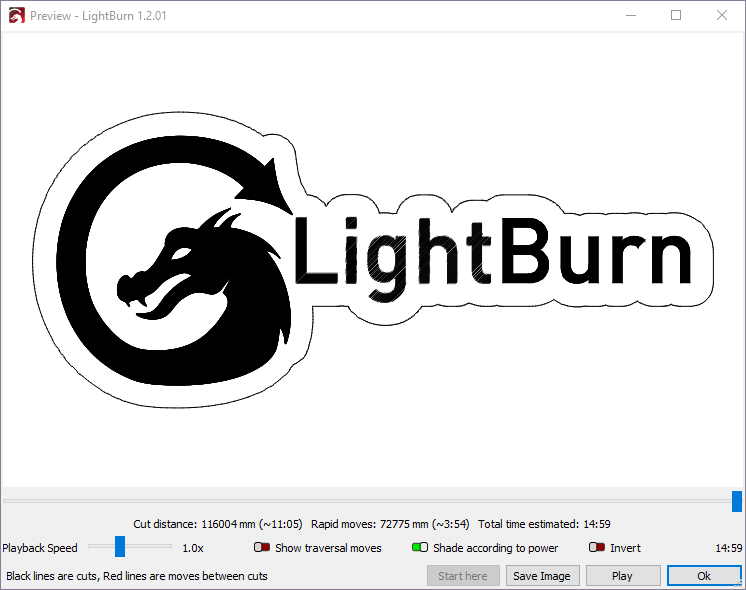
In the above design, black could be used for a solid, dark engraving, blue could be a very light engraving with an outline to add definition to the text, and red would be a slow, high-power cutting layer. The final output to the laser might look like this:
The information shown in the Cuts / Layers window is just the basics. You can see the full set of options for a layer by double-clicking the entry in the layer list to bring up the Cut Settings window.
Controlling the Laser
There are two windows primarily used to control the laser:
The Laser Window, shown in the lower right of the display by default, lets you select your laser, start, stop, or pause a job, frame the design (move the laser head around the boundary of your design to test alignment), and more. These options can vary based on the type of laser you're using.

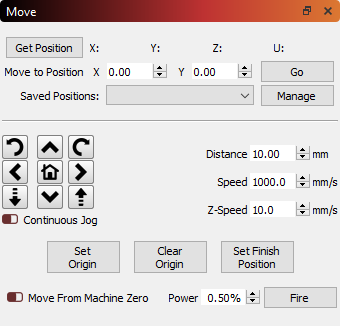
The Move Window, docked behind the Cuts / Layers window by default, gives you jog buttons and positioning control, and the 'Speed' value there is used when framing or jogging the laser in LightBurn.
There are a couple other methods for moving the laser that are noteworthy:
- The Click-to-Position tool (
 ) on the Creation Tools toolbar lets you click anywhere in the workspace and LightBurn will jog the laser to that point.
 - Note that this assumes that your laser has been properly homed - Some DIY-style machines do not have homing switches, so using any form of absolute positioning in LightBurn requires extra steps.
- The number pad arrow keys can be used to jog the laser after clicking in the edit window (workspace).
- The Arrange menu and arrangement tools can be used to move the laser relative to artwork in the workspace.
